 Ever dreamed of wielding a beautifully crafted cutting board, not just as a kitchen tool, but as a testament to your own handiwork? Cutting Board Kits make that dream a reality, offering a rewarding journey into woodworking, even for complete beginners. These all-inclusive sets provide everything you need to transform raw materials into a functional piece of kitchen art, perfect for your own culinary adventures or as a thoughtful, personalized gift.
A Brief History of Cutting Boards
Cutting boards have been indispensable kitchen companions for centuries, evolving from simple flattened stones or logs to the diverse range of materials we see today. Historically, they were purely practical, protecting surfaces and providing a stable base for chopping. As culinary arts advanced, so did the appreciation for the materials and craftsmanship, leading to the development of specialized boards for different tasks and ingredients. The rise of DIY culture and the desire for personalized home goods has brought cutting board kits into the spotlight, blending tradition with modern accessibility.
Decoding Cutting Board Kits: What’s Inside?
A typical cutting board kit is designed to simplify the woodworking process, often requiring minimal specialized tools. Here’s what you can generally expect to find:
- Pre-cut Hardwood Pieces: The heart of your cutting board! These are usually precisely milled and surfaced, ready for assembly. Common wood choices include rich walnut, light maple, and vibrant cherry, often selected for their durability, tight grain, and food-safe properties. Some kits even feature exotic woods like Zebrawood, Angelique, or Andira for a unique aesthetic.
- Food-Safe Wood Glue: A crucial component to bond your wood pieces together securely and safely for food contact.
- Sandpaper: A range of grits (e.g., 120, 180, 220) to achieve a smooth, refined finish.
- Cutting Board Oil or Balm: Essential for seasoning and protecting your finished board, enhancing its natural beauty and prolonging its life.
- Step-by-Step Instructions: Often a printed guide, and sometimes even a private video tutorial, walking you through each stage of the building process.
Many kits pride themselves on being “glue-ready,” meaning the wood pieces are already planed and jointed, eliminating the need for complex milling tools.
Optional Add-Ons for Enhanced Craftsmanship
Some cutting board kits go the extra mile with optional additions:
- Clamps: While not always included, clamps are highly recommended for proper glue-up to ensure tight, strong bonds.
- Laser Engraving Voucher: Imagine adding a personal touch like a logo, signature, or a special message to your handmade board! Some kits offer this as a post-assembly service.
- Gift-Ready Packaging: If you’re crafting a cutting board as a present, some kits come in attractive packaging, complete with stickers and thank-you notes.
Choosing the Right Kit for Your Needs
Selecting the perfect cutting board kit depends on your woodworking experience, desired aesthetic, and intended use.
Wood Material Matters
The type of wood significantly impacts the board’s appearance, durability, and how it interacts with your knives.
- Hardwoods (Maple, Walnut, Cherry): These are popular choices for their resilience, beautiful grain patterns, and ability to withstand knife marks.
- Maple: A hard, dense wood known for its light color and durability. While excellent, some sources suggest it might be slightly harder on knife edges than walnut or cherry.
- Walnut: Features deep, rich tones and is often considered a bit softer than maple, making it gentler on knife blades.
- Cherry: Known for its warm, reddish hue that deepens with age, and its relatively softer nature, which is also kind to knives.
- Exotic Woods: Kits may include options like Zebrawood, Angelique, or Andira, offering unique visual appeal.
- Woods to Approach with Caution: While widely available, some experts advise against bamboo and teak for primary cutting surfaces due to their high silica content, which can dull knives more quickly. Glass and ceramic boards should be avoided entirely for cutting, as they can severely damage knife edges.
End-Grain vs. Edge-Grain Construction
This is a critical distinction, especially for wooden cutting boards.
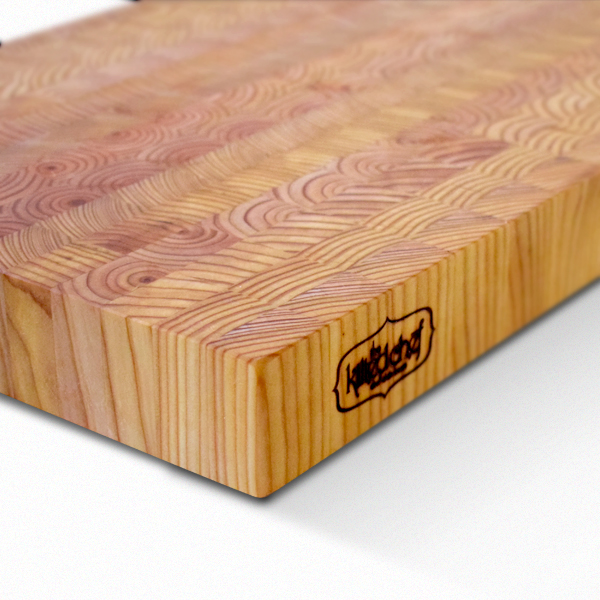
- End-Grain Boards: These are created by arranging wood pieces so the end grain (the tree’s growth rings) faces upward.
- Benefits: End-grain is superior for knife longevity because the wood fibers separate slightly when a knife cuts into them, then “heal” back, much like a deck of cards. This keeps knives sharper for longer and makes the board more self-healing, showing fewer cut marks. End-grain boards are also generally thicker and less prone to warping if properly constructed.
- Considerations: They are typically more labor-intensive to produce, consume more material, and are therefore more expensive.
- Edge-Grain Boards: Constructed by orienting wood strips with the long grain facing up.
- Benefits: Less expensive and easier to construct.
- Considerations: They are harder on knives, show knife marks more readily, and can be more prone to warping. Deep scars in edge-grain boards can harbor bacteria, potentially making them less sanitary over time unless frequently sanded or replaced.
When choosing a kit, consider if it specifies end-grain or edge-grain, and what level of knife care and board maintenance you’re comfortable with.
Crafting Your Masterpiece: Assembly and Finishing Tips
Once you have your cutting board kit, the real fun begins!
- Preparation is Key: Ensure your workspace is clean and flat. Lay out your pre-cut wood pieces and arrange them in your desired pattern. Many kits come with “glue-ready” pieces that are already smoothed and flattened, making assembly straightforward.
- The Glue-Up: Apply a generous, even layer of food-safe wood glue to the edges of the wood strips you’re joining. Clamp the pieces tightly together, ensuring a strong, seamless bond. Wipe away any excess glue that squeezes out immediately with a damp cloth. Allow ample drying time as per the glue manufacturer’s instructions, often 24 hours.
- Shaping and Smoothing: After the glue has fully cured, you might need to trim the ends of your board for a perfectly square or rectangular shape. A miter saw, circular saw with a guide, or a table saw can be used for this step. Then, it’s time for sanding. Start with a coarser grit sandpaper (like 120) to remove any glue residue or minor imperfections, then gradually move to finer grits (180, then 220) for a silky-smooth finish. Don’t forget to round over the edges for a more comfortable feel.
- The Finishing Touch: This step is crucial for protecting your board and bringing out the wood’s natural beauty. Apply a food-safe mineral oil or wood wax generously, allowing it to soak into the wood. Wipe off any excess after a few hours. Repeat this process several times until the wood no longer readily absorbs the oil. This “seasoning” creates a protective barrier against moisture and bacteria.
Essential Care for Your Handcrafted Cutting Board
Proper care will ensure your cutting board lasts a lifetime.
- Cleaning: Always handwash your wooden cutting board with mild soap and warm water immediately after use. Avoid soaking it or putting it in the dishwasher, as excessive moisture can lead to warping or cracking.
- Drying: After washing, dry the board thoroughly with a towel and store it on its side to allow for even airflow, preventing moisture from accumulating on one surface.
- Regular Oiling/Waxing: Reapply food-safe mineral oil or wood wax regularly (monthly or as needed) to keep the wood hydrated and protected. This prevents it from drying out, cracking, and helps maintain its luster.
- Sanitation: While wood has natural antimicrobial properties, always use separate cutting boards for raw meats and poultry to prevent cross-contamination. Plastic boards are often recommended for raw proteins as they can be sanitized in a dishwasher.
Beyond the Kitchen: Creative Uses and Considerations
Your beautifully crafted cutting board isn’t just for chopping vegetables!
- Serving Platter: The aesthetic appeal of a well-made wooden board makes it perfect for serving cheeses, charcuterie, appetizers, or even desserts.
- Decorative Element: When not in use, a handsome cutting board can lean against a backsplash or hang on a wall, adding a touch of rustic elegance to your kitchen decor.
- Photography Prop: For food bloggers or enthusiasts, a unique cutting board can elevate food photography.
Frequently Asked Questions
Q: Are cutting board kits suitable for complete beginners in woodworking?
A: Absolutely! Many cutting board kits are specifically designed with beginners in mind, providing pre-milled, “glue-ready” wood pieces and detailed instructions, often including video tutorials. This allows you to focus on assembly and finishing without needing extensive woodworking experience or specialized power tools.
Q: What tools do I absolutely need to assemble a cutting board kit?
A: For most basic kits, you’ll primarily need clamps to hold the wood pieces together during glue-up. Sandpaper (usually included) and a food-safe finish (also often included) are essential. While some kits suggest a saw for trimming ends, it can often be done with a hand saw and a straight edge, or you can even find kits with pre-sized pieces that might not require trimming.
Q: How long does it take to make a cutting board from a kit?
A: The actual assembly time for most kits is relatively short, often just an hour or two for gluing and initial clamping. However, you’ll need to account for glue drying time (typically 24 hours) and multiple applications of oil or balm for proper seasoning, which can span several days to a week for the best results.
Q: Can I personalize my cutting board from a kit?
A: Yes! Many kits offer opportunities for personalization. You can experiment with different wood arrangements for unique patterns. Some vendors even offer optional laser engraving services after you’ve finished assembling your board, allowing you to add names, dates, or custom designs.
Q: How do I maintain my homemade wooden cutting board?
A: Regular maintenance is key. Always handwash with mild soap and water, avoiding dishwashers. Dry it immediately and store it on its side. Reapply food-safe mineral oil or wood wax monthly, or whenever the wood appears dry, to keep it hydrated and prevent cracking.
Embark on Your Crafting Journey
Choosing the right cutting board is crucial for any kitchen, impacting both knife longevity and food safety. But crafting your own with a cutting board kit is an experience unlike any other. It’s a chance to connect with your tools, understand the beauty of natural materials, and create something truly meaningful and enduring. So, grab a kit, unleash your inner artisan, and prepare to elevate your kitchen with a cutting board that’s uniquely yours. Don’t be afraid to experiment with different woods and finishes to truly make it your own.